Learn a side French braid with our easy tutorial and step-by-step pictures. Start by separating your hair into three sections and crossing the right strand over the middle strand.
Then, cross the left strand over the middle strand. Continue adding hair to each side and crossing it over until you reach the end. Secure the braid with an elastic band, and you’re done! This hairstyle is perfect for any occasion and can be easily achieved by beginners.
Follow our simple instructions and create a beautiful side French braid in no time.
:max_bytes(150000):strip_icc()/The-Ultimate-French-Braid-Tutorial-75f65f852d3a495e8f2beed7a38b6504.png)
Introduction To Side French Braid
Learn how to do a side French braid with this easy tutorial. Follow step-by-step instructions accompanied by pictures to create a stylish and trendy hairstyle. Perfect for beginners and suitable for long and medium-length hair.
What Is A Side French Braid?
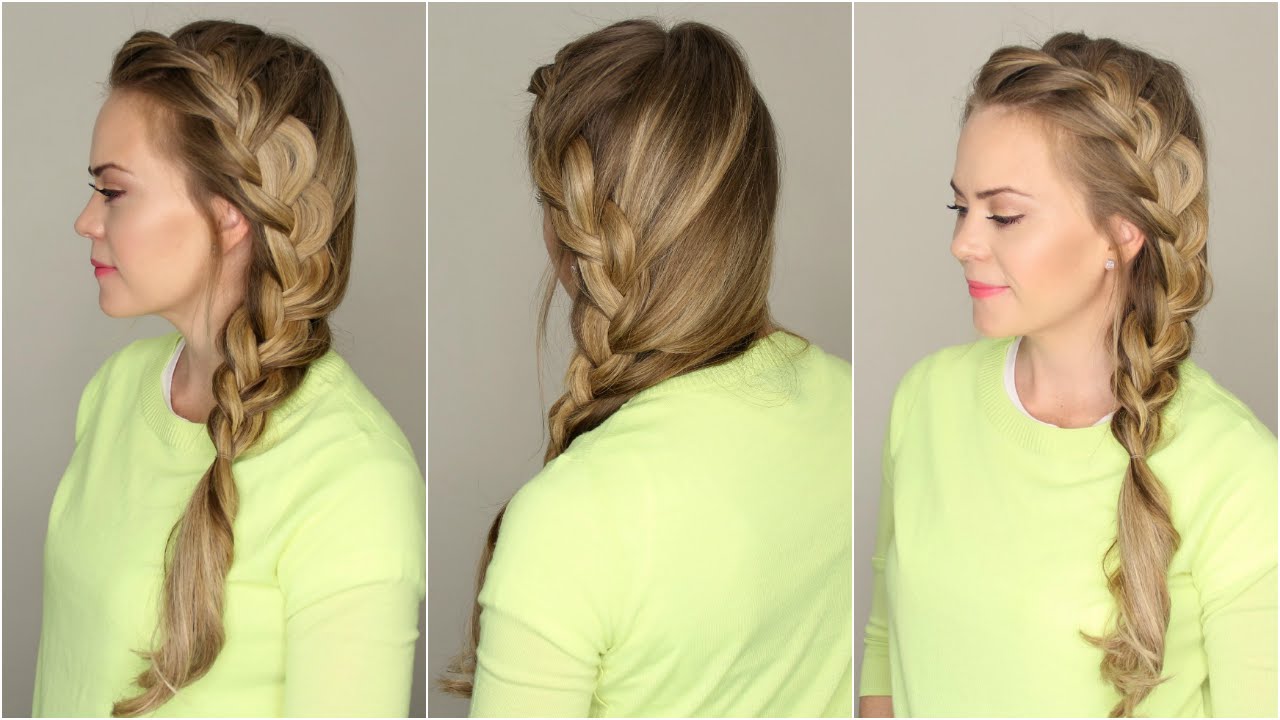
A side A French braid is a versatile and trendy hairstyle that adds a touch of elegance to any look. It involves weaving three strands of hair together in a diagonal pattern along the side of the head, starting from the top and working your way towards the nape of the neck. This braid style is perfect for casual and formal occasions, as it keeps your hair neatly in place while embodying a chic and feminine aesthetic.
Advantages Of Side French Braid
There are several advantages to opting for a side French braid:
1. Practicality: The side French braid is stylish and practical, as it keeps your hair off your face and neck, preventing any distractions or discomfort throughout the day.
2. Versatility: This braid style can be customized to suit various hair lengths and textures, making it suitable for almost everyone. Whether you have long, medium, or short hair, you can easily create a side French braid that enhances your natural beauty.
3. Longevity: A side French braid can last for several hours or even the entire day, making it an excellent choice for events or occasions requiring a long-lasting hairstyle.
4. Natural Volume: When done with slightly teased hair, a side French braid can add volume and dimension to your hair, creating a fuller and more textured look.
5. Styling Options: You can incorporate various accessories, such as ribbons, flowers, or pins, to enhance the overall appearance of your side French braid and match it with your outfit.
Materials Needed
To successfully create a side French braid, you will need the following materials:
- Comb or brush
- Hair elastic or clear elastic bands
- Hairspray or hair gel (optional)
These basic materials are readily available and affordable, ensuring you can easily achieve this beautiful hairstyle without fancy tools or products.
:upscale()/2020/03/16/910/n/1922153/netimglebT2y.jpg)
Step-by-step Tutorial For Side French Braid
Learn how to do a side French braid with our easy step-by-step tutorial, complete with pictures. This beginner-friendly guide will help you effortlessly achieve a beautiful side French braid hairstyle.
Preparing The Hair
To begin with, make sure your hair is clean and dry. Brush your hair thoroughly to remove any tangles or knots. This will make working with and creating a neat and polished braid easier. Apply a small amount of texturizing spray or hairspray to give your hair some grip and hold while braiding.
Dividing The Hair Into Sections
Next, divide your hair into two equal sections down the middle. Use a fine-toothed comb to create a precise parting. You can use a hair clip or elastic band to secure one area while you work on the other. This will keep your hair organized and prevent it from getting tangled.
Braiding The Side French Braid
Now, let’s start creating the side French braid. Take a small section of hair near your hairline on one side. Divide it into three equal strands.
| Step | Description |
|---|---|
| 1 | Please take the right strand and cross it over the middle strand. |
| 2 | Then, take the left strand and cross it over the middle strand. |
| 3 | Add a small section of hair from the side of your head to the right strand. |
| 4 | Cross the right strand and the added section over the middle strand. |
| 5 | Repeat steps 3–4 on the left side, adding a small section of hair to the left strand before crossing it over the middle strand. |
| 6 | Continue repeating these steps, adding small sections of hair to each strand, until you reach the nape of your neck. |
| 7 | Once you reach the nape of your neck, continue braiding a regular three-strand braid until you reach the end of your hair. |
| 8 | Secure the braid with a hair elastic. |
Braiding the side French braid may take some practice, but with time and patience, you can master it. Remember to keep the braid neat and tight by pulling on the strands gently as you go. Don’t forget to secure the braid with hair elastic at the end to prevent it from unraveling.
There you have it! A beautiful and stylish side French braid that is perfect for any occasion. To create your unique look, experiment with variations, such as adding accessories or incorporating them into a half-up hairstyle.
Tips And Variations For Side French Braid
The side French braid is a versatile and stylish hairstyle that can be worn for any occasion. The side French braid is a great choice.
For an everyday look or a special event hairstyle. In this article, we’ll explore some tips and variations to help you master the side French braid with ease.
Adding Accessories To The Braid
Adding accessories to your side: A French braid can take your hairstyle to the next level. Here are some accessory ideas to consider:
- Flower crown: Add a flower crown to your side French braid for a boho-chic vibe. Choose flowers that complement your outfit for a stunning look.
- Ribbons or bows: Incorporating ribbons or bows into your braid can add a touch of femininity and playfulness to your hairstyle.
- Jeweled hairpins: Adding jeweled hairpins along the braid can add a touch of glamour and sparkle to your overall look.
Creating A Messy Side French Braid
You can opt for a messy French braid if you prefer a more relaxed and effortless look. Here’s how to achieve it:
- Start by creating a deep side part in your hair.
- Gather a small section of hair at the front and divide it into three equal sections.
- Begin braiding the hair by crossing the right section over the middle section, then the left section over the new middle section.
- As you continue braiding, incorporate small sections of hair from the side closest to your face.
- Continue braiding until you reach the nape of your neck, and then secure the braid with an elastic band.
- Gently pull on the sections of the braid to create a messy and voluminous look.
Incorporating Other Braiding Techniques
You can incorporate other braiding techniques to add more interest and creativity to your French braid. Here are some ideas:
| Dutch braid: | The Dutch braid is created by crossing the strands under each other instead of over. Incorporate the Dutch braid technique on one or both sides of your French braid for a unique look. |
| Waterfall braid: | Add a waterfall braid to your French braid by dropping sections of hair as you braid along the side. This gives your braid a cascading effect, perfect for an elegant hairstyle. |
| Fishtail braid: | Intertwine a fishtail braid with your side French braid for a bohemian-inspired hairstyle. Use smaller sections of hair to create the fishtail effect. |
By incorporating these different braiding techniques, you can create a unique and personalized side French braid that suits your style and preferences.
Now that you have these tips and variations, you can confidently experiment and create stunning side French braids that will turn heads wherever you go. Whether you add accessories, create a messy look, or incorporate other braiding techniques, the possibilities are endless. Have fun and enjoy creating beautiful hairstyles with your side French braid!
Frequently Asked Questions For How To Do A Side French Braid: Easy Tutorial With Pictures
How do you do a side French braid step by step?
To do a side French braid, start by dividing a section of hair on one side. Take three strands and begin braiding by crossing the right over the middle strand, then the left over the central strand. As you continue, add more hair to each strand before crossing them over.
Repeat until you reach the nape of the neck, then finish with a regular braid and secure with an elastic band.
How To Do A One Side Braid?
To do a side braid, start by taking a small section of hair at the front and dividing it into three strands. Cross the right strand over the middle strand, then the left one over the central strand.
Continue this pattern, adding small sections of hair each time you cross over until you reach the end. Secure with a hair tie.
How To Do Viking Side Braids?
To do Viking side braids, start by parting your hair to the side. Divide a small section of hair near the front into three equal parts. Cross the right strand over the middle, then the left over the middle.
Continue adding hair to each side and crossing over until you reach the nape of your neck. Secure the braid with an elastic band and repeat on the other side if desired.
How To Do A Dutch Side Braid?
To do a Dutch side braid, divide your hair into two sections. Take a small piece from the front of one area and cross it to the other section. Repeat on the other side. Continue adding hair to each section as you go, crossing it under until you reach the end.
Secure with a hairband.
Conclusion
Braiding your hair can seem daunting at first, but with this easy tutorial on how to do a side French braid, you’ll be able to master the technique in no time. You can create a beautiful and stylish side braid by following the step-by-step instructions and using the accompanying pictures.
Whether you’re a beginner or have some experience with braiding, this tutorial will guide you through the process and help you achieve a gorgeous hairstyle. So go ahead and give it a try, and show off your stunning side French braid.
DIY hair oils are some of the most important ingredients to have in your beauty arsenal. They add shine, manage frizzy hair, and help improve your hair health.