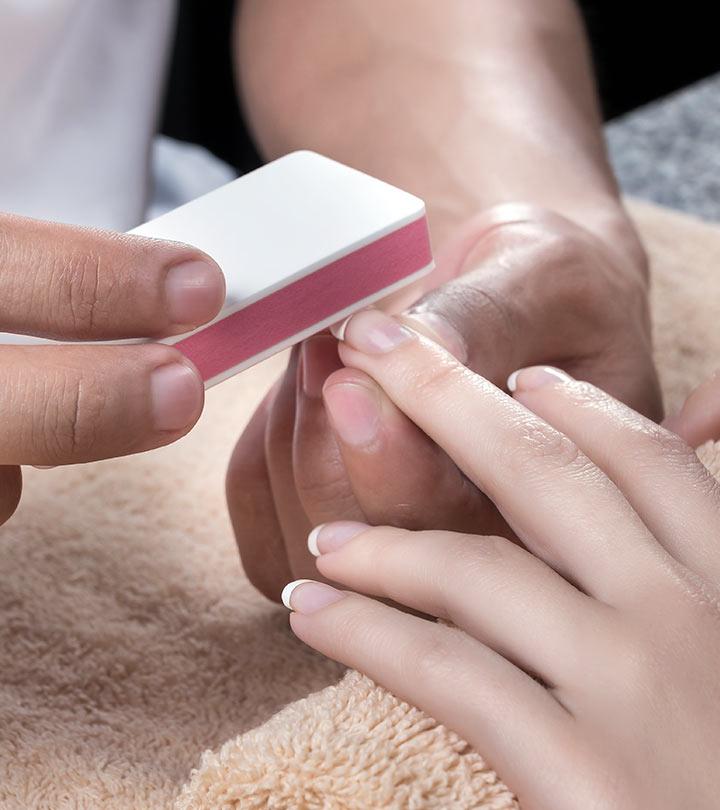
Nail buffing is the process of using a buffer board to file your nails, ensuring they remain healthy, sturdy, and shiny for an extended period. Many of us neglect nail care, living with chipped or broken nails under the assumption that they will grow out properly.
However, nail buffing helps maintain the integrity and appearance of your nails. By using a buffer board, you can smooth out ridges and create a consistent, polished look. So, next time you’re thinking about trimming your nails, consider giving them a buff to keep them in top shape.
Credit: www.stylecraze.com
What Is Nail Buffing
Nail buffing is the process of using a buffer board to file and polish your nails, resulting in a healthier, stronger, and shinier appearance. It helps to maintain the overall well-being and aesthetics of your nails.
Definition
Nail buffing is the process of polishing or rubbing the nails using a buffer board, also known as a nail buffer. The buffer board consists of fine grits that help to smoothen the surface of the nails and make them look shiny and consistent.
Benefits
- Improves nail appearance: Nail buffing helps to remove ridges and imperfections on the nail surface, providing a smooth and even look.
- Enhances nail health: By buffing the nails, blood circulation to the nail bed is stimulated, promoting healthier nail growth.
- Strengthens nails: Buffing can make the nails stronger by reducing the chances of chipping and breakage.
- Increases nail polish adherence: Buffing the nails creates a smooth surface, allowing nail polish to adhere better and last longer.
- Encourages natural shine: Buffing brings out the natural shine of the nails, giving them a healthy and vibrant appearance without the use of nail polish.
- Relaxing and therapeutic: The process of nail buffing can be a calming and enjoyable experience, helping to relieve stress.
- Easy and cost-effective: Nail buffing can be done at home with a simple buffer board, saving both time and money compared to salon treatments.

Credit: www.amazon.com
How To Buff Nails
When it comes to nail care, most people are familiar with trimming and filing their nails regularly. But have you ever wondered about nail buffing and what it actually entails? Nail buffing is a technique that uses a buffer board to file your nails, ensuring that they remain healthy, sturdy, and shiny for a long period of time. In this article, we will break down the steps involved in the nail buffing process so you can achieve salon-worthy nails right at home.
Step 1: Filing Your Nails
The first step in the nail buffing process is to file your nails to your desired shape. Using a high-quality nail file, gently file the edges of your nails in a smooth, rounded motion. Remember to file in one direction, rather than back and forth, to prevent any damage or splitting. This will create a clean canvas for the buffing process and ensure that your nails are even in length.
Step 2: Buffing
Once your nails are filed, it’s time to move on to the buffing step. Start by selecting a fine-grit buffer board, preferably one that has multiple sides for different levels of buffing. Begin by using the coarsest side of the board, moving it back and forth across the surface of each nail in a gentle motion. This will help to smooth out any ridges or imperfections on the nail surface.
Next, switch to the finer-grit side of the buffer board and continue buffing each nail. This finer grit will further refine the nail surface and create a smooth texture. Be sure to buff each nail evenly, paying attention to any areas that may require extra attention.
Step 3: Polishing
After you have finished buffing your nails, it’s time to move on to the polishing step. Take a soft, lint-free cloth and gently wipe away any dust or residue from the buffing process. This will ensure that your nails are clean and ready for the next step.
Step 4: Shining
The final step in the nail buffing process is to add shine to your nails. This can be done by using a nail buffer or a specialized buffer block. Using gentle, circular motions, buffer the surface of each nail to create a glossy finish. This will enhance the natural shine of your nails and leave them looking healthy and beautiful.
Remember, it’s important to approach the buffing process with a gentle hand. Buffing too vigorously or using a coarse buffer can lead to thinning of the nail plate over time. It’s also crucial to give your nails a break from buffing to allow them to regenerate and strengthen.
By following these simple steps, you can achieve professional-looking nails right at home. Regular nail buffing can help improve the overall appearance and health of your nails, making them less prone to breakage and promoting faster growth. So, why not give it a try and enjoy the benefits of beautifully buffed nails?
Different Types Of Nail Buffers
You know about trimming your nails, but we bet you have wondered exactly what nail buffing is. Nail buffing is the act of polishing the nail using buffers of successively finer grit in order to make nails look more consistent and shiny. It uses a buffer board to file your nails, making sure they remain healthy, sturdy, and shiny for a long period.
Four-sided Nail Buffers
A popular type of nail buffer is the four-sided nail buffer. These buffers typically have four sides – file, buff, polish, and shine. Each side is numbered, making it easy to know which side to use for each step. Start with the most coarse side to file your nails and gradually move to the smoothest side for a shiny finish.
Electric Nail Buffers
If you’re looking for a quicker and more efficient way to buff your nails, electric nail buffers are worth considering. These devices use a rotating buffer head to gently file and polish the nails. They are designed to save time and effort while achieving professional-looking results. Electric nail buffers are particularly useful for those who prefer a hassle-free nail care routine.
Diy Natural Nail Buffers
If you prefer a more natural approach to nail care, DIY natural nail buffers are a great option. These homemade buffers often use common household ingredients like lemon, baking soda, or olive oil to buff and shine the nails. By opting for natural ingredients, you can avoid exposing your nails to harsh chemicals while still achieving a beautiful finish. DIY natural nail buffers are not only cost-effective but also environmentally-friendly.
As you can see, there are various types of nail buffers available depending on your preferences and needs. Whether you prefer the convenience of an electric nail buffer or the simplicity of a DIY natural nail buffer, buffing your nails regularly will help keep them looking healthy and shiny.
Common Mistakes To Avoid While Nail Buffing
Avoid these common mistakes while nail buffing to ensure the best results. Use a buffer board to file your nails, keeping them healthy, sturdy, and shiny for a long time.
Nail buffing is a great way to achieve smooth and shiny nails. However, there are a few common mistakes that people make while buffing their nails that can lead to damaged or unhealthy nails. In this section, we will discuss the most common mistakes to avoid while nail buffing to ensure that you get the best results.Over-buffing
One of the biggest mistakes that people make while buffing their nails is over-buffing. It’s important to remember that nail buffing is meant to gently smooth the surface of your nails, not to aggressively file them down. Over-buffing can thin out the nails, making them weaker and more prone to breakage. Additionally, excessive buffing can lead to nail damage and even infections. So, be sure to use light pressure and avoid buffing the same area for too long.Buffing Damaged Or Infected Nails
Another common mistake is buffing damaged or infected nails. If you have any cuts, sores, or infections on your nails, it is best to avoid buffing them. Buffing damaged nails can worsen the condition and delay the healing process. Similarly, buffing infected nails can spread the infection to other nails or even the surrounding skin. It’s always recommended to treat any nail issues before attempting to buff them.Using The Wrong Side Of The Buffer
Using the wrong side of the buffer is a mistake that many people make without even realizing it. Nail buffers typically have different sides with varying degrees of coarseness. It’s important to use the correct side for each step of the buffing process. Starting with the coarsest side helps to shape and smooth the nails, while the smoother side helps to refine the surface and add shine. Using the wrong side can result in uneven or unsatisfactory results. To summarize, there are a few common mistakes to avoid while nail buffing. Avoid over-buffing to prevent nail thinning and damage. Refrain from buffing damaged or infected nails to avoid worsening the condition or spreading the infection. Finally, make sure to use the correct side of the buffer for each step of the buffing process. By avoiding these mistakes and following proper nail buffing techniques, you can achieve beautiful, healthy, and shiny nails.Tips For Maintaining Buffed Nails
Maintaining buffed nails involves using a buffer board to file and polish your nails, ensuring they remain healthy, strong, and shiny. Nail buffing helps to promote nail growth and maintain their appearance.
Moisturizing
Moisturizing is an essential step in maintaining buffed nails. When you buff your nails, you are removing the outer layer, which can make them more prone to dryness. To prevent this, make sure to moisturize your nails and cuticles regularly. This will help to keep them hydrated and prevent any peeling or cracking.
Use a nourishing cuticle oil or a moisturizing hand cream to keep your nails and cuticles healthy. Apply the moisturizer after buffing your nails and massage it in gently. This will not only keep your nails well-moisturized but also promote nail growth and strengthen them from within.
Wearing Gloves For Protection
Protecting your buffed nails is vital to maintain their shine and prevent any damage. One way to do this is by wearing gloves when performing household chores or any tasks that involve exposure to water, chemicals, or rough surfaces.
Water and chemicals can cause the nail polish or shine to wear off, causing your nails to lose their luster. Additionally, rough surfaces or heavy-duty activities can lead to chipping or breaking of the nails. By wearing gloves, you can create a protective barrier that keeps your buffed nails safe and prevents them from getting damaged.
Choose gloves that fit well and are comfortable to wear. Opt for gloves made of latex or vinyl that offer adequate protection against water and chemicals. For tasks that require heavy-duty protection, consider using gloves with reinforced palms or fingers to minimize the risk of nail damage.
Credit: www.reddit.com
Frequently Asked Questions For You Know About Trimming Your Nails, But We Bet You Have Wondered Exactly What Nail Buffing Is. It Us
What Does Buffing Fingernails Do?
Nail buffing is the process of polishing nails using buffers to make them look consistent and shiny. It involves using a paste to fill ridges on the nail surface. Buffing can help improve the overall appearance of nails.
What Is Nail Trim And Buffing?
Nail trim and buffing is the process of cutting and smoothing the nails to make them look neat and shiny. Nail trim uses trimmers to cut the nails, while nail buffing uses a grinder to shorten and polish the nails.
Buffing helps to fill ridges on the nail surface and make them appear more consistent and shiny.
What Is The Buffing Tool Used For Nails?
A buffing tool is used for nails to file, buff, polish, and shine them. It typically has four sides, each serving a different purpose. Starting with the most coarse side, the tool helps to make nails look consistent and shiny.
Nail buffing is done using a buffer board to ensure healthy and sturdy nails.
Which Direction Should You Buff Your Nails?
Buff your nails in one direction, preferably from the base of the nail towards the tip.
Conclusion
Nail buffing is a simple yet effective way to keep your nails healthy and shiny. By using a buffer board, you can file your nails and make them look consistent and strong. Many of us neglect our nails, but with regular buffing, you can prevent chipping and breakage.
So, next time you think about trimming your nails, don’t forget about the benefits of nail buffing. Keep them looking flawless and well-maintained with this quick and easy technique.
DIY hair oils are some of the most important ingredients to have in your beauty arsenal. They add shine, manage frizzy hair, and help improve your hair health.